
I thought about building a real golf hitting tee on my property, thinking I could have a beautiful and natural hitting surface. You know? Just like on TV where the pros get to practice and warm up.
The thought didn’t last long. Much like the golf green story, dealing with real grass is a bit of a nightmare…
– you have to grow the grass
– you have to water the grass
– you have to mow the grass
– you have to maintain the grass
Not to mention, after a solid practice session the grass will not be grass anymore – divots everywhere.
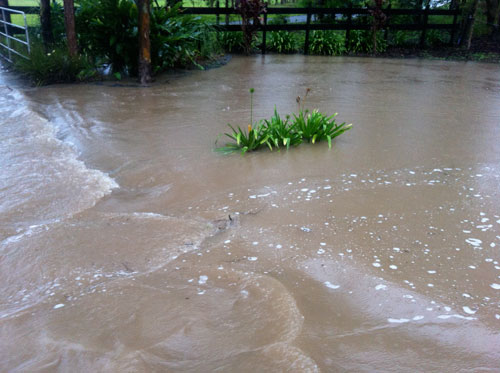
So a real life practice area sounds like a great idea but for me it was more of a dream. Just way too much time and effort required to get it operational, and then hard work to maintain it. The other issue I had, and this only came about after I moved into my property, is that the bottom part of my farm goes under water in heavy rain. A real grass tee was just not going to happen!
After speaking with Bruce Warwick, he suggested a synthetic hitting surface laid on top of crusher dust and sand. He also suggested that it wasn’t too hard to build and I could save myself a few bucks by doing it myself. I was up for this challenge!
Like any bloke who is hopeless at building stuff, I enlisted the help of the brother in law. Andrew is an outdoor kinda guy and doesn’t mind getting his hands dirty. We got to work.
The golf tee build
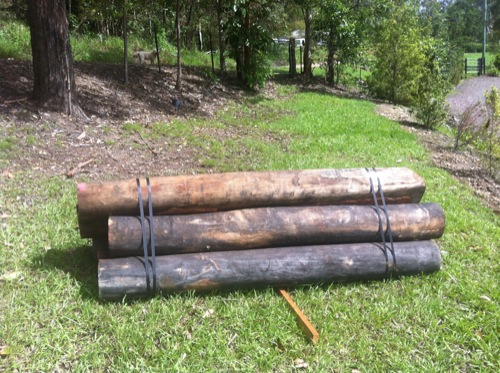
A quick visit to the local saw mill and we secured 12 x 2.4 metre logs. They were only about $40 each and this was for treated logs. In my mind this was a pretty good deal, especially when we got delivery thrown in at no cost.
The logs are heavy and Andrew was on the ball by getting his mate David to help out for the day. David is a machine driver and just happened to have a mini excavator available. This was a handy break and I recommend asking around, because everyone probably knows someone who knows someone who can help. I had to throw in a few slabs of beer and buy pies for lunch, but all the lads were happy.
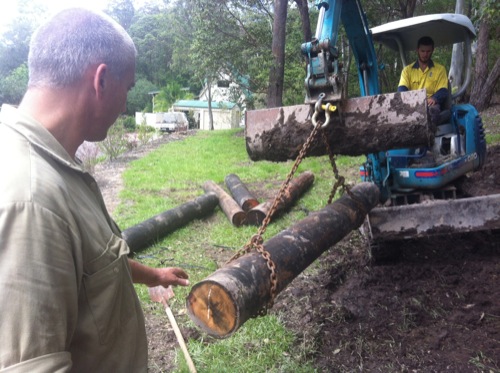
After a little digging, David and the excavator made light work of it, we laid the logs out. We put two in the front and one on each side. From here we loaded each bay with sand and crusher dust and that was it. There was a bit of stuffing around because we used the ute to cart the sand and the boys made me do a fair bit of the grunt work. Once the blisters kicked in I pulled up stumps.
It didn’t take that long. We started mid-morning and were finished by mid-afternoon. The hardest thing was getting the excavator off and on the tip truck. This was a nightmare and lucky for us David knew what he was doing. Here are the costs associated so far.

Logs – $40 x 12 = $480
Tip truck hire = $150
Beer – $80
Lunch – $30
Total cost $740
Please note: I didn’t need to order sand or crusher dust because I had plenty of it. The golf green was located on an old-horse arena.
With the tee foundation set in place the only thing to do was wait on the grass to be laid on top. There were some delay issues with all the rain but Bruce finally finished a few months after the initial construction. Bruce finished things off nicely by,
– compacting the sand
– smoothing it out
– laying down the grass
– fastening it into position
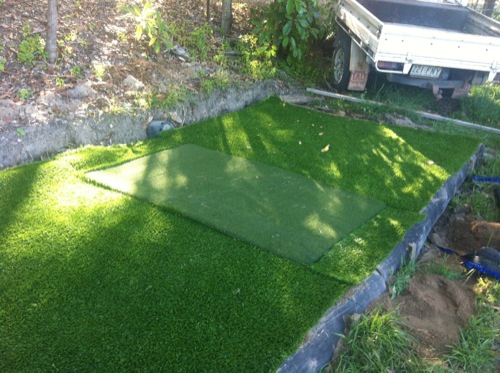
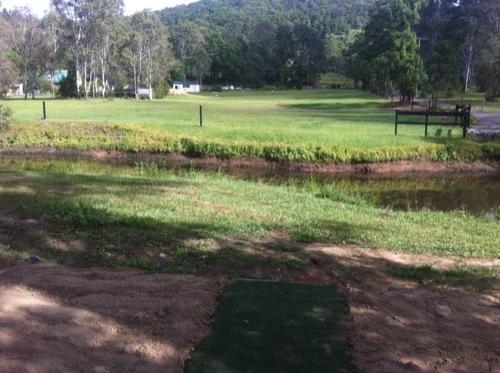
And this is the final result. Two perfect hitting tees at either end of my practice fairway. All up, including the cost of the grass, I’ve spent a little over $1000. This is a pretty good price to have TWO hitting tees built. They will last a lifetime and they require NO maintenance. The golf tees are ready and waiting anytime I want to whack some balls.
Some more info on the synthetic golf tee grass
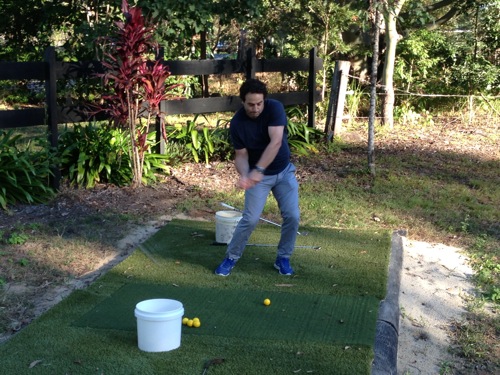
To keep costs down Bruce used a cheaper grass around the edge of the tee box and a premium, golf specific synthetic grass, in the middle. The idea is I stand on the cheaper grass and hit off the good stuff. And let me tell you, the premium golf tee is awesome. It provides really good feedback and it doesn’t leave any ugly grass stains on the bottom of the club. And it’s durable too, I’e hit thousands of shots from them already and there’s no sign of wear marks or degradation. Bruce assures me my golf tees will last as long as I’m on the property.
At the end of the day, building the foundation wasn’t too hard. With a little help and some machinery, it was done in around half a day and best of all I saved around $1000-$1500 by doing them myself.
If you’d like to see more photos of the complete construction of the golf farm, then check out this page.
Comments are closed.