
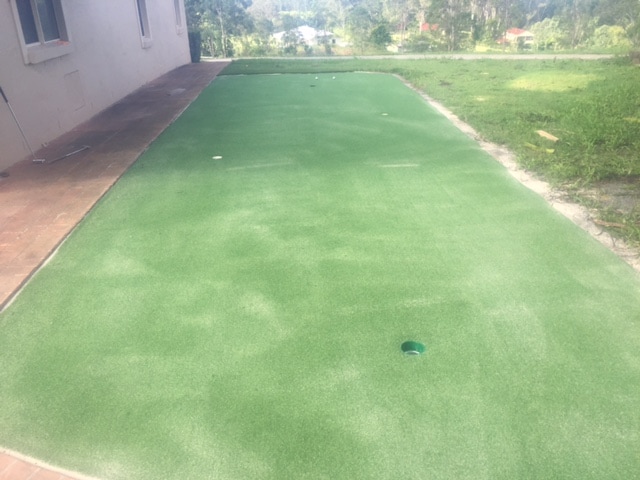
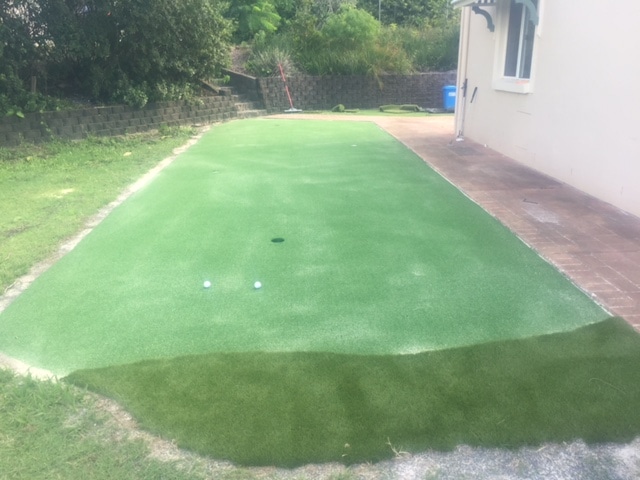
I’ve just finished my latest backyard synthetic putting green (I built one last year but it was really small and not a very good representation on what we can do). I wanted to showcase our latest DIY putting grass and experience for myself how it performs day to day. And so far I’m impressed. It rolls exceptionally well and it absorbs the impact of lofted shots nicely. I’ve actually been backing down the hill and hitting 50 metre shots – and the ball stops no problem.
And I’ve documented each step of the install process in detail and now have a comprehensive DIY Guide that can assist any golfer looking to do their own install. So how hard was the install?
It’s not overly complicated. If you take your time and do each step properly it’s completely doable. It also helps if you have some expertise (why I’ve developed the guide) and get someone to help (there’s lifting involved and just easier with two people). I found the infill the worse part of the job. Just when I thought I was finished, it took a few hours extra to get the green running properly. The rain we had here last week certainly didn’t help but I got there in the end.
Note: The green is still a little sandy but this will disappear in a week or so.
More detail…
Size: 10m x 3.7m
Approximate cost: $2000 (this price includes all the base material)
I have fringe grass at either end and have put in our brand new 50mm pile couch grass and it’s awesome. It’s nice and lush and simulates coming out of thickish greenside rough.
Cups: 2 x Platinum and 2 x standard cups. I wanted to showcase the difference between either cup.
Install time: This is a difficult question to answer because I’ve been off and on this project since December. But I’d say, that total time for construction would be 2 – 3 days.
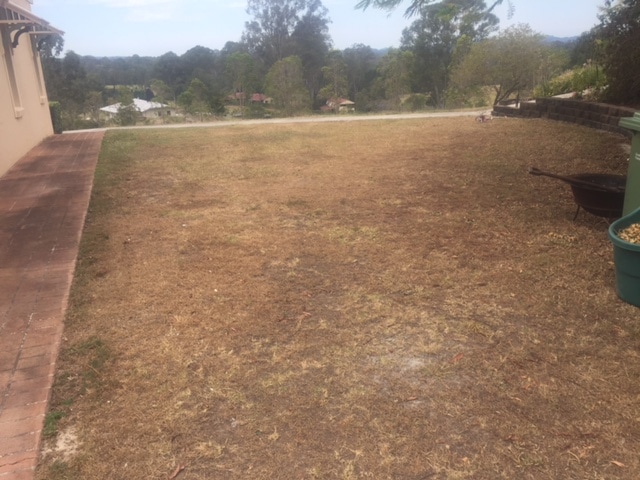
I’m really happy with it and the end result is far better than the beaten up bit of ground that was here before (see below).
If you’ve always wanted your own golf green and don’t have the $$$ for a full install, then a DIY project like this could be just what you’re looking for. Please visit this page for a FREE quote.