Righto! You’ve made your mind up and have decided to take the plunge (or you’re at least very interested) and get yourself a synthetic backyard golf green. So what are the steps? Glad you asked.
Step 1: Figure out the area you’ve got to work with:
Time to make a plan. And you don’t need to go all fancy pants and get a surveyor in or draw up a professional plan. Nope. A mud map is just fine. Essentially, I just need to know the area we’re working with.
To be totally upfront and honest with you, I totally recommend going with the biggest green you think you can get away with. Here are a few reasons why:
a. You’re in the quote phase. You will not be locked in (no matter who you choose) and you can always change your mind or alter your plan later. It’s good to know what your dream set up is going to cost and go from there.
b. Nobody has ever complained about their golf green being too big. But many times, I’ve had clients, who have rushed this step and chosen a green that’s a little on the small side. They are disappointed they didn’t go bigger.
c. It way more expensive to add to your green later. I’ve had a few clients do this and it costs a fortune. So best to take your time, think everything through and start with the largest option.
Special tip: Find some scrap paper and draw a rough design down (see below). Be sure to mark the key measurements (like the length and width), then take a photo of your amazingly simple drawing and send it through to me (the quote form even as a special function where you can upload this image).
Another special tip: Don’t worry too much about the exact shape and design (and hole locations) at this point. If you have your heart set on a specific design then go for your life. But I can certainly help you with final design options when I see your drawing. I’ve done hundreds of these things and have all sorts of ideas to help you get the most bang for your buck. The biggest thing is to understand the total area and then go from there.

Step 2. Work out any extras you may want:
The big thing to consider is a fringe grass. I can’t recommend this more highly as it provides a great area to chip/pitch from. The fringe grass also looks totally awesome and provides a really nice contrast from the putting surface grass (I spent a lot of time working out the best looking and performing fringe grass for this exact purpose). The fringe grass is also ideal to fill in the gaps.
i.e. the putting surface grass is 3.7m wide. If, for example, you have a 4.2m width you can use the fringe around the perimeter to fill in the gap. This saves having a join in your green, is way easier to do and actually will cost you a few bucks less.
Other things for consideration:
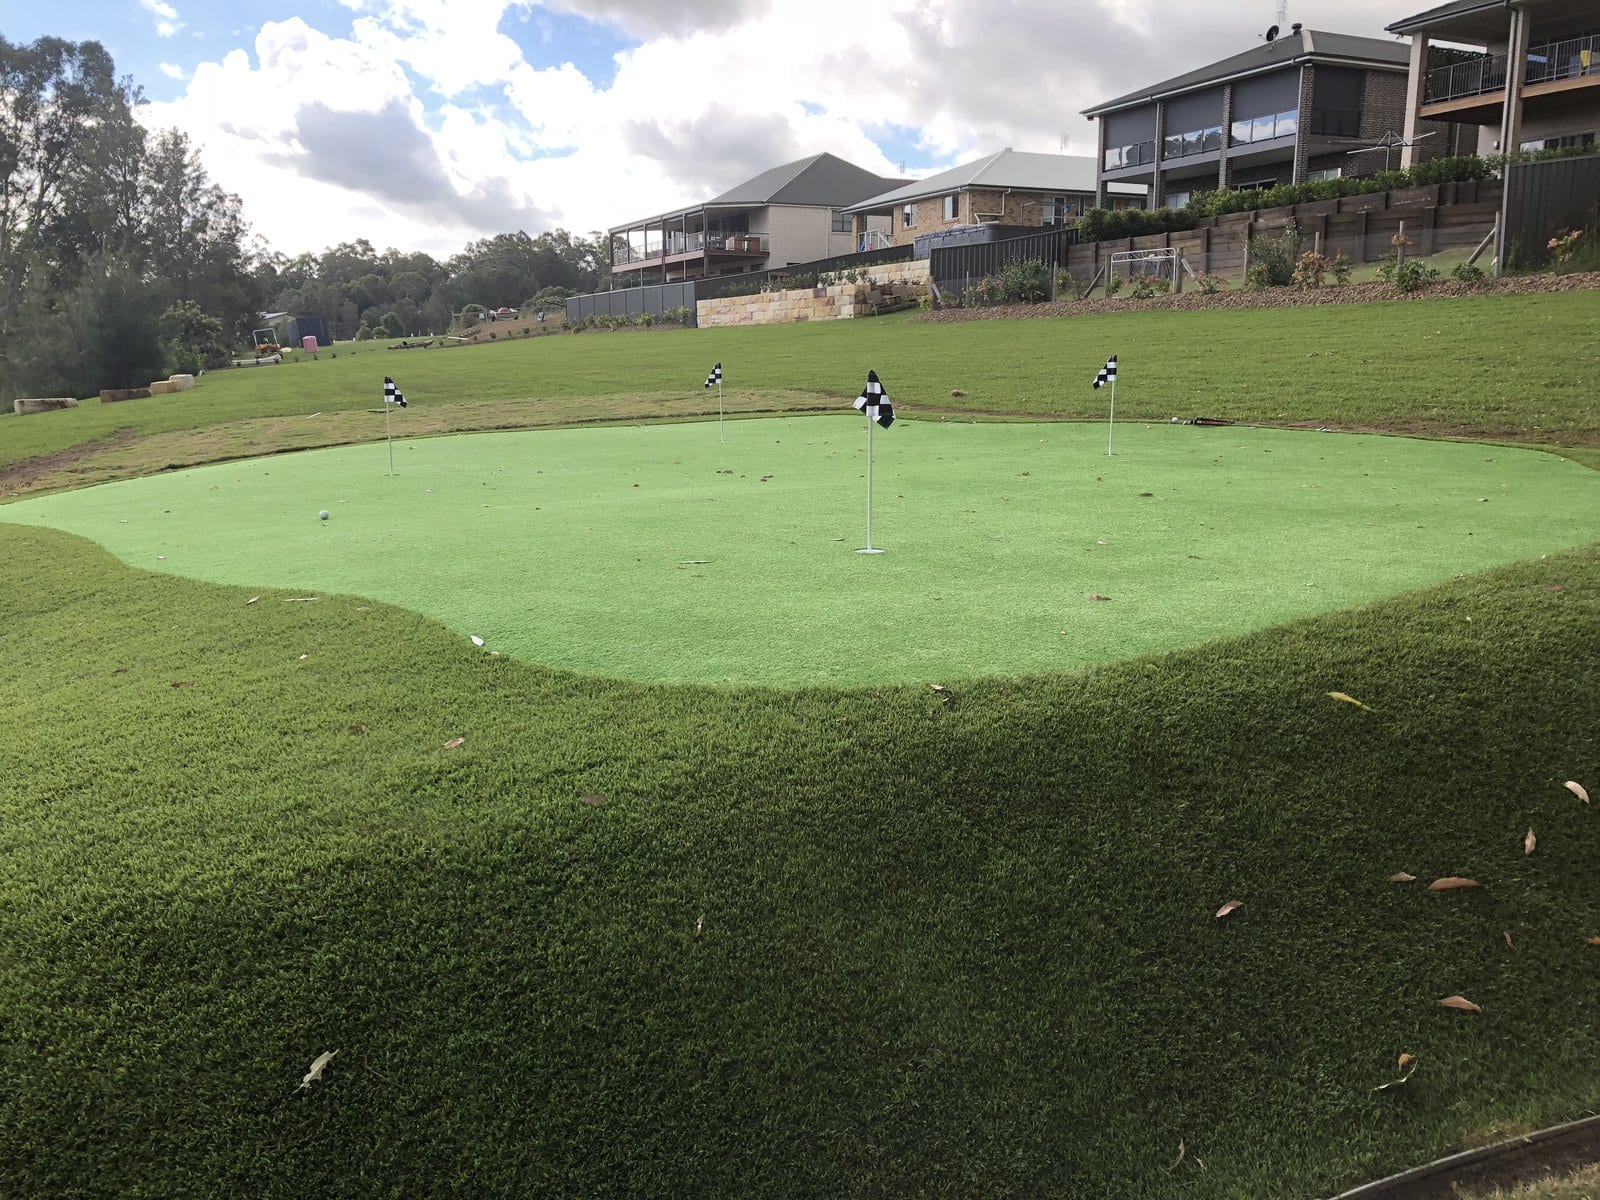
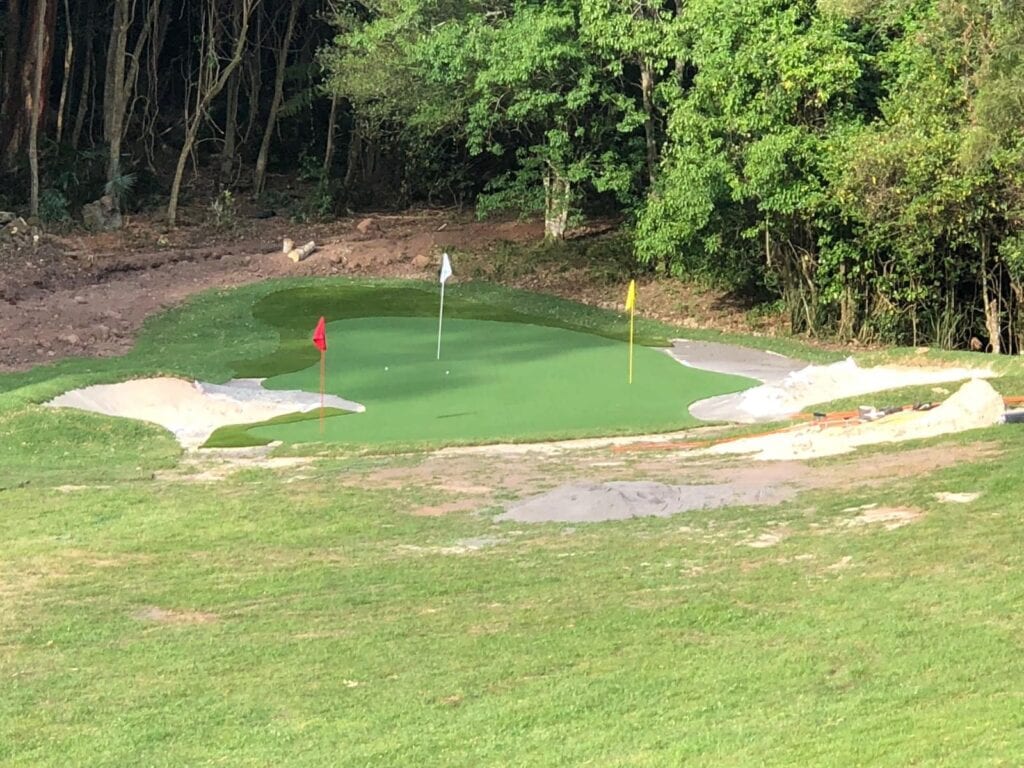
a. Flags – these finish your green off nicely and give the entire area a “golfy” feel. I personally like the black & white checked mini-flags.
b. Hitting net – if you’ve got the room then a hitting cage/net is also totally awesome to keep your long game in shape.
c. Bunkers – again, if you’ve got the room a bunker is a great addition to your green
d. Tees – there are plenty of options here, including chipping tees, but also properly constructed tees for belting balls onto the green from
Note: Once I see you diagram I will recommend the right amount of cups you’ll need. In most cases this will be 3 or 4 for a small backyard green. On a large green you may get away with 5 cups (and maybe 6). My cups are now made from aluminium and are powder coated – I’m no longer selling or recommending the cheap plastic cups because they don’t last (the little buggers disintegrate over time).
Step 3. Request a quote
Now is the time to share your design with me. You can visit this page, fill in your information and hit the button. This is a totally stress-free and no obligation step. There’s no hard selling from me or my team, we’ll simply review the information you’ve sent and get back to you with some pricing and design ideas. In most cases, we’ll respond in 24 hours via email but may call you if we have any other questions.
Some things you should tell us:
a. Are you interested in DIY or full install (if you want a quote for both, just tell us in the comment section)
b. Share your vision as best you can, either with the written word or a diagram (you can upload the diagram from the form)
c. If you’re after a full install, now is also a good time to share any access issues your property may have (like there’s no way one can get a machine out the back)
d. Make sure you include your postcode so I can factor in shipping/freight costs.
Step 4. Wait a bit
I don’t like to muck around here. I usually get back to everyone as quickly as possible (inside 24 hours but it can take a little longer on weekends). So sit back, grab a beer and dream about how good your golf game is going to become when you have your very own putting green.
Step 5. Review
I need to be upfront once again. These golf greens are premium and come at a cost (there are some minimum price ideas on the quote form). Some people can get the fright of their lives when the initial quotation comes through and if you are under the impression you can get some totally amazing golf green for under $500 then this is not going to be the product for you.
Once you get the quote it’s time to chat to the better half and see how everything fits into your budget. I have found time and time again the more upfront we are with the wife (one of my funny clients referred to his wife as the CEO of Everything) the more likely we are to get what we want. Trying to pull one over her is not going to work that well and I think our female friends have an amazing bullshit detector anyway and know when we’re, well, bullshitting.
And here’s the best bit: If the price has come in higher than you anticipated then we can work with you. We can reduce the size of the golf green or limit the amount of accessories (you don’t really need 5 bunkers, 7 tees and the golf simulator). If you get me on a good day you may be able to squeeze me on the price too 🙂
And once we work together here and you’re happy to move forward, we can lock in a start date or arrange an invoice for DIY. My goal is to make the process as smooth and as easy as possible. Everything starts by first understanding what size area you have and going from there. My team and I can certainly help you maximise your space and give you plenty of ideas.
The final point here: It doesn’t cost anything to get a quote from me. All you need to do is click this link, fill in the form and I’ll get back to you soon with some ideas. So there’s nothing to lose.
[button_3 text=”next-step.png” align=”center” href=”/quote” new_window=”Y”/]
P.S. If you are after a full install then almost always a site inspection works out best. This is not just a measure and quote. We go the extra mile to understand exactly what you need and offer all the options available to you. This is a paid service, with the price deducted from any future work you sign up for. But please, start off with telling me more about what you’d like with your golf green set up.