
I’ve written about a synthetic golf tee before (here, here and here) but here’s a more comprehensive guide to building your very own backyard golf tee.
Please note: These tees are much better than the standard golf mats you can buy from most online retailers because you can’t place a standard tee into them and the golf tees below are 100 times more durable. If you’re after the best option, then our synthetic golf tee is the way to go.
If you have the room and want to hit lofted and full shots, then you must get yourself a proper synthetic golf tee. The main reason is it’s practically impossible to maintain a real life hitting surface. It only takes an hour or so of practice and your pride and joy will be covered in divots. The thing is, proper golfing turf is expensive to build and maintain. And let’s be honest, the chances are you don’t have the time to care for it.
A synthetic golf tee is the next best option.
Supreme Greens have a highly realistic and durable golf tee product. It’s so strong that I dare you to wear it out. I have been testing my tee for over two years and I’ve hit tens of thousands of shots from it and can’t notice any serious wear on it. It truly is amazing.
This grass is realistic in the fact that if you hit the ball heavy, your club will dig in, giving you feedback. Those usual driving range mats cause the club to bounce off the surface, so you get a good shot, but you’re not learning. You’re getting positive feedback, when in fact, you should be getting the opposite.
And most are surprised when I can pull out a standard tee and place it into the grass. Long gone are those annoying rubber tees (because they break easily and you can never get them at the right height). You can use any tee with this synthetic tee and hit all sorts of shots (iron, fairway woods, utility woods and of course, your driver club).
The only issue with our synthetic golf tee grass
The only problem with this tee grass is that it’s not great to stand on. The grass pile is high (45mm) and really soft. So standing on it and playing a shot is like hitting from a mattress. It just doesn’t feel that good and your feet tend to move around. The solution is a good one however.
We recommend using our top quality synthetic golf tee grass as an insert, so you get the full benefit for hitting all sorts of golf shots and then using a firmer (and cheaper) synthetic grass to stand on.
Here’s how you build it.
The best way is to use standard sleepers as the frame. Sleepers are cheap and usually easy to come by (the client whose tee is featured below had some left overs from a retaining wall).
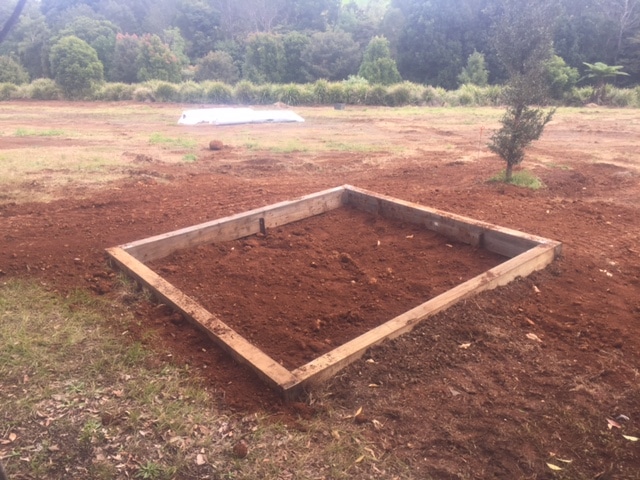
As a basic guide, the average sleeper is 2.4m long. So to keep things easy your standard tee can be 2.4m x 1.2m. This is plenty big enough but by all means use longer sleepers if you wish. The choice is yours.
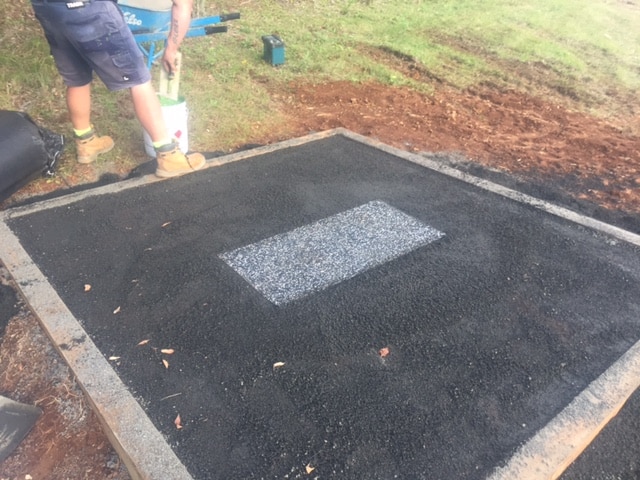
Once you have fastened the sleepers together your job now is to fill with sand/dirt/crusher dust. It doesn’t really matter what you use as long as the ground is compacted and stable. We have found the best method is to use leftover dirt in the bottom and then crusher dust on the top.
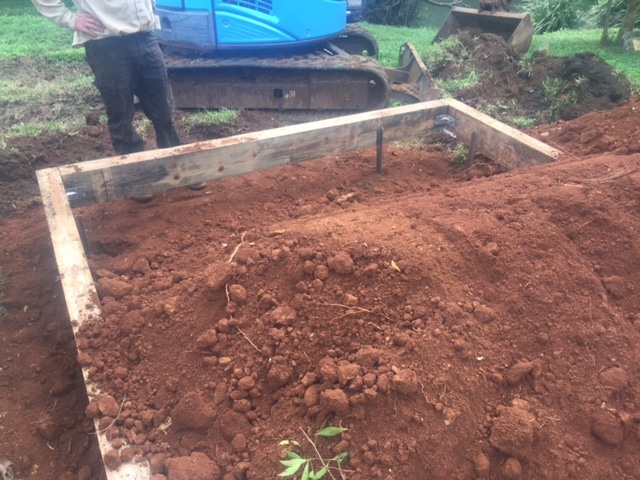
Your next job is to use a rubber insert as a base for the actual golf tee part. The rubber provides a nice shockpad and allows you to stick the actual synthetic tee part to something solid. After testing a whole range of options, this is by far the easiest and best method for getting the ultimate teeing ground. Simply dig out an area and place the shockpad into the tee.
It makes sense to place in the middle of the tee so both left and right handed golfers can use.
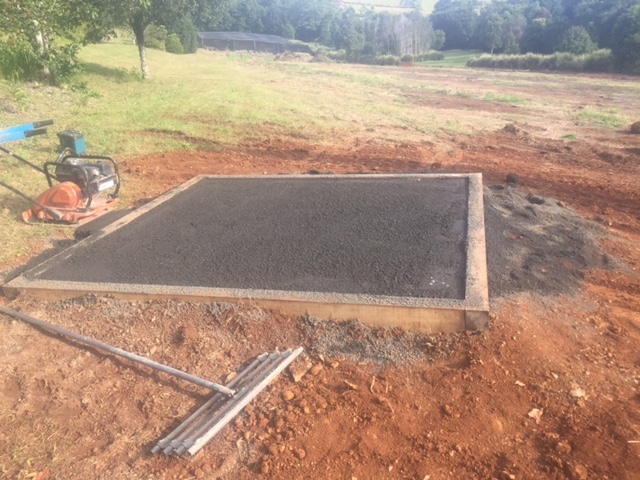
Place joining tape around the edges of the shockpad and then place your synthetic golf tee insert over the top. We do recommend you gluing the tee insert onto the rubber insert too (this rubber cement can be purchased from most hardware stores).
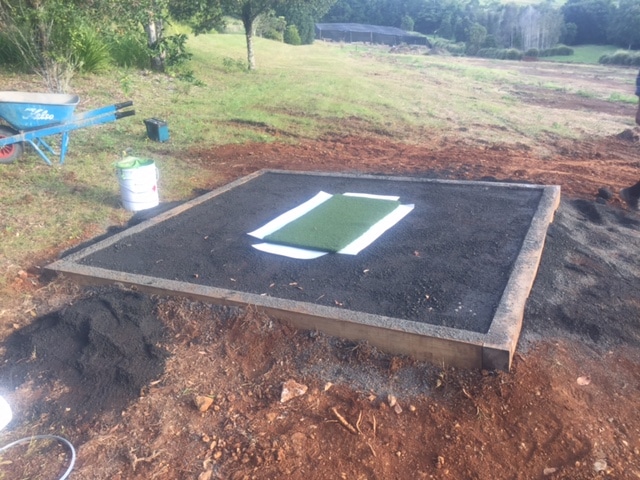
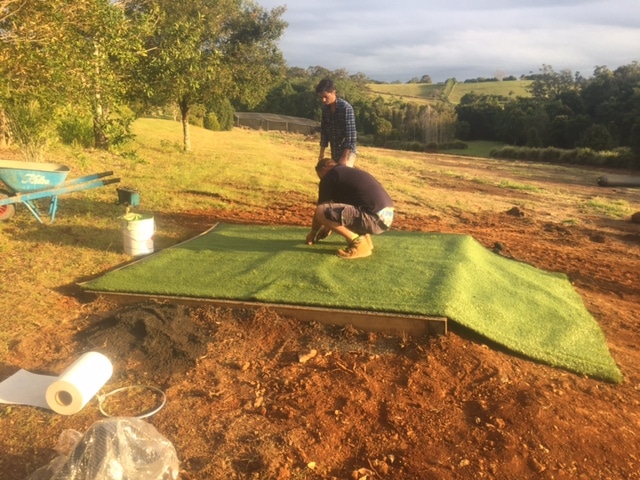
We are almost there. Now you want to lay down the landscape grass over the top. We recommend this grass because it provides a much more stable base and it’s also a lot cheaper than the premium hitting surface. In fact, synthetic golf tee grass is probably the most expensive grass there is. Once you have laid down the outside grass, trim around the insert and cut to size. A tidy trick is to bolster the edges between the crusher dust and sleepers. This gives a really clean finish and ensures the grass will not lift.
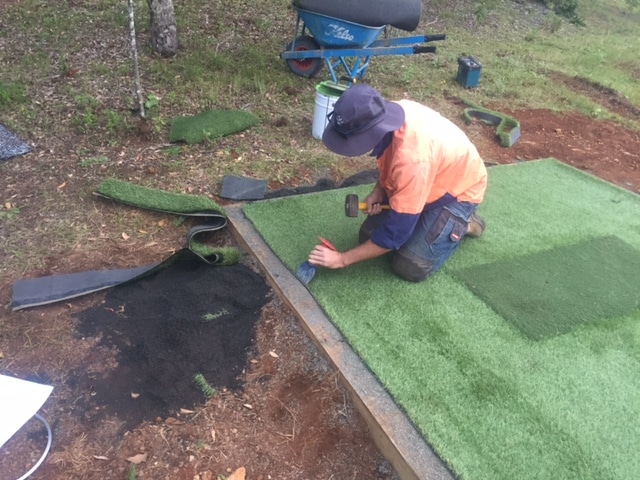
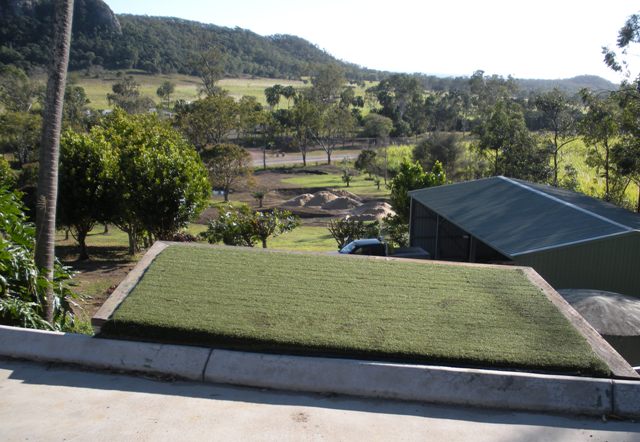
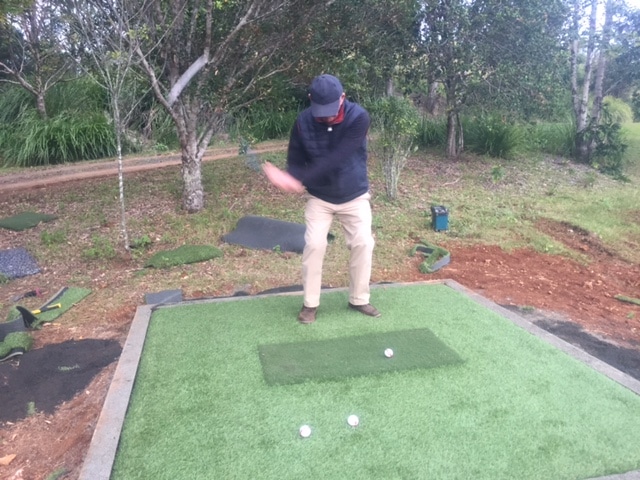
And now your synthetic golf tee is ready for use. We’ve tried all sorts of options over the years but this tee configuration is absolutely the best. These golf tees are really easy to build (even I can do it) and they are long lasting. The synthetic grass golf tee is so strong and durable I doubt you’ll need to replace it (maybe if it’s a commercial facility and even then, replacing the insert is easy).
How much will this cost?
All up, including the cost of the materials, you should be able to build your synthetic golf tee for around $600. This isn’t too bad considering some of the premium driving range mats cost upwards of $650 per tee.
If you’re interesting in your own synthetic golf tee, please contact us for more.
Comments are closed.